
Building an Android App
Introduction
Unity is one of the most versatile platforms for creating interactive content, including mobile apps for Android. This guide will walk you through the step-by-step process of building an Android app using Unity.
https://www.youtube.com/watch?v=4bfWBK4-I8U&ab_channel=LuminousXRPrerequisites:
Unity Hub with the 6000.0.25f1 version of Unity installed.
Android Build Support module installed via Unity Hub.
An Android device for testing.
Step-by-Step Guide:
1. Setting up the Environment:
- Launch Unity Hub and open your project.
2. Configuring the Project:
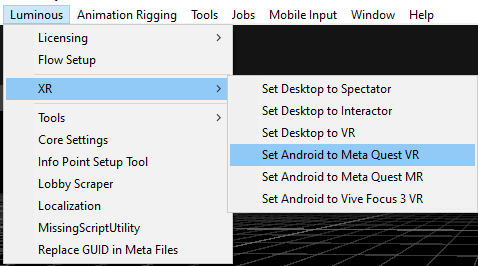
- Use the Luminous menu to set the VR settings to your platform of choice.
Luminous > XR > Set Android To Meta Quest VR
- Ensure that you include all of your module scenes within the Build Scenes found via
File > Build Profiles.
Configure Player Settings
- Go to
Edit > Project Settings > Player. - Configure the Company Name, Product Name, and Package Name (in reverse domain style like
com.companyname.appname). - Set an appropriate icon, splash image, and other UI-related settings as needed.
- Under
Other Settings, ensure theMinimum API Levelis 23 or greater. - The Android Target SDK is set to 32 or greater.
- In
Graphics APIs, ensureOpenGLES3is selected.
Sign the App
- If you are releasing a build onto a public storefront you need to sign your App. Scroll down to Publishing settings in the Player Settings Window.
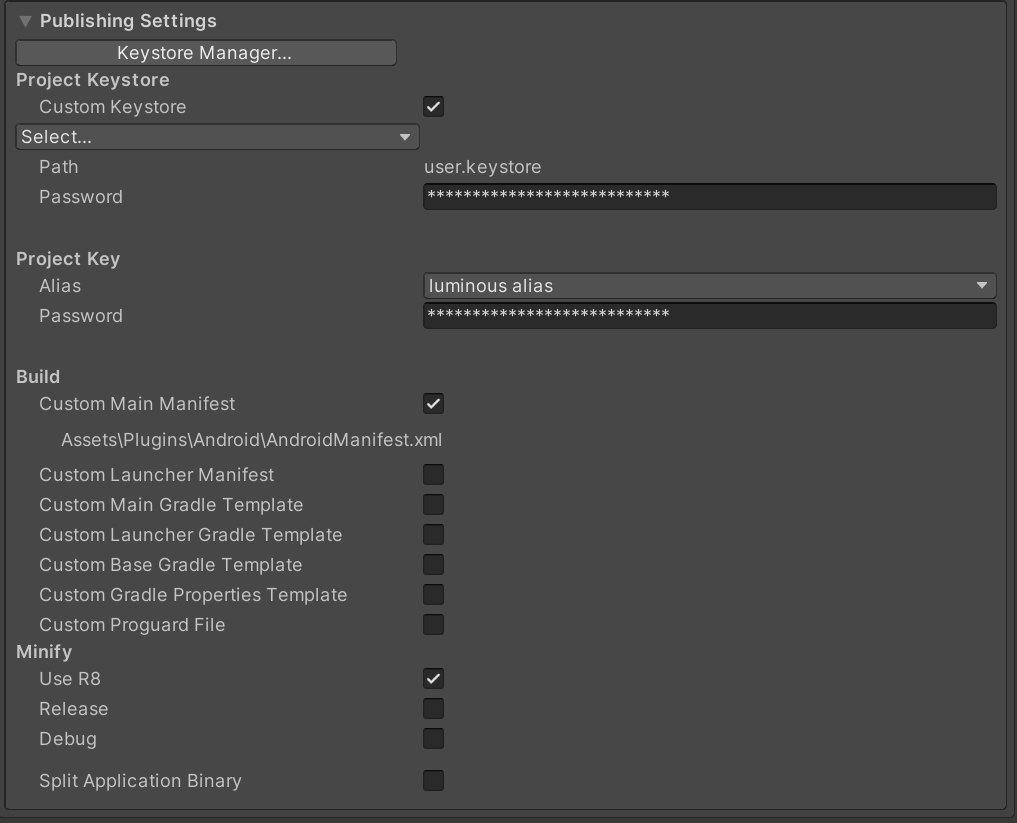
Publishing Settings
- Open the Keystore Manager and create a new Keystore
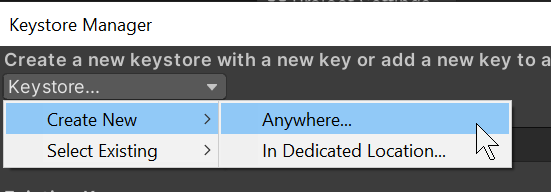
Keystore Manager
Build Addressables
- Go to
Window > Asset Management > Groupsto open the Addressables window.
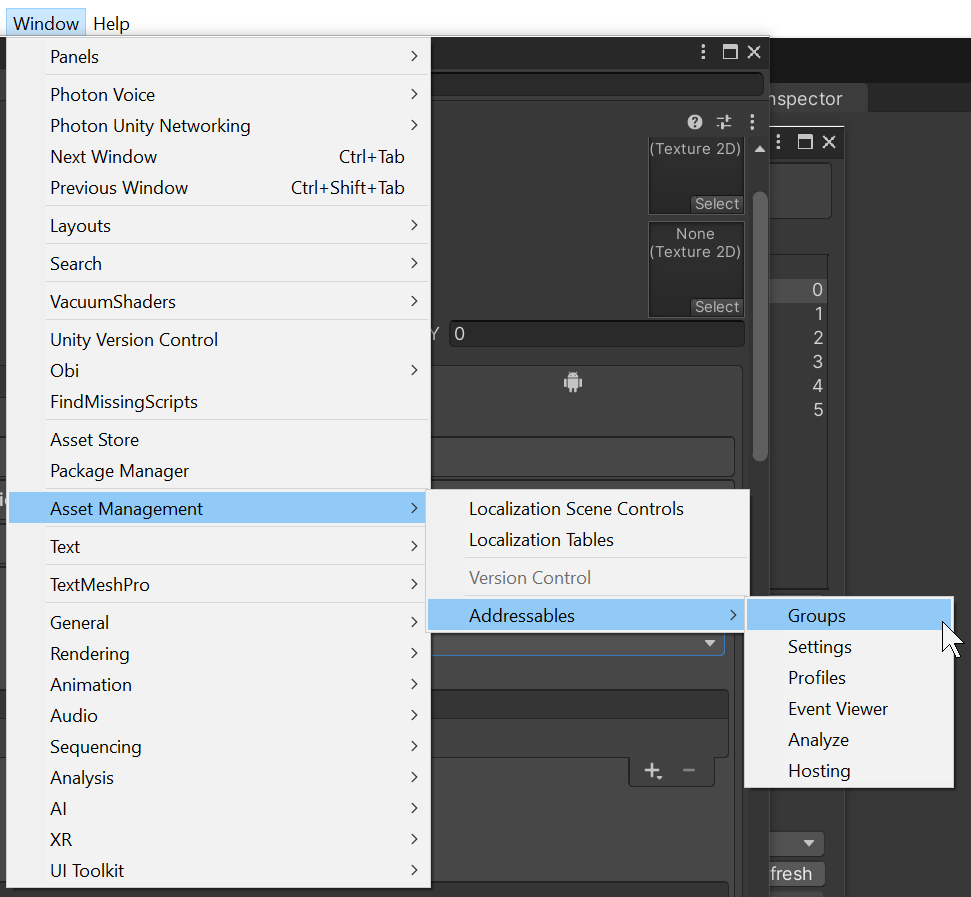
Opening the Addressables Groups Windows
- Click on
Build > New Build > Default Build Script
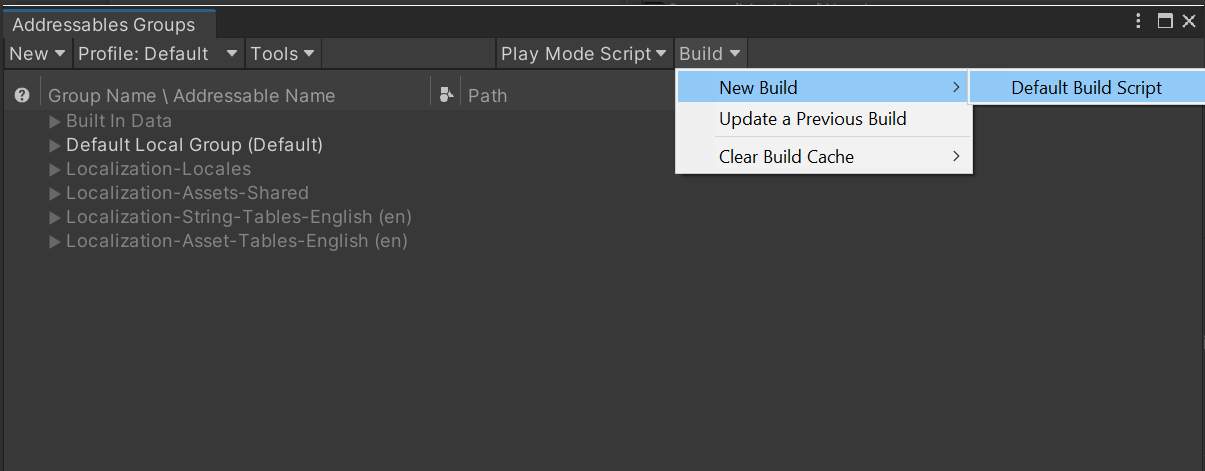
Addressables Window
The first time you build Addressables for your project can take a while!
6. Building the App:
Now you are ready to begin building the App.
- Go to
File > Build Profiles. - Click on
Build(to generate an APK). - Choose a directory to save your APK, and Unity will start the build process.
7. Testing on a Device:
- Connect your Android device to your computer via USB.
- Ensure USB Debugging is enabled on your device (found in Developer Options).
- Run the Meta Quest Developer Hub application
- Click on Device manager and drag your newly built APK over the window and drop it on the connected device.
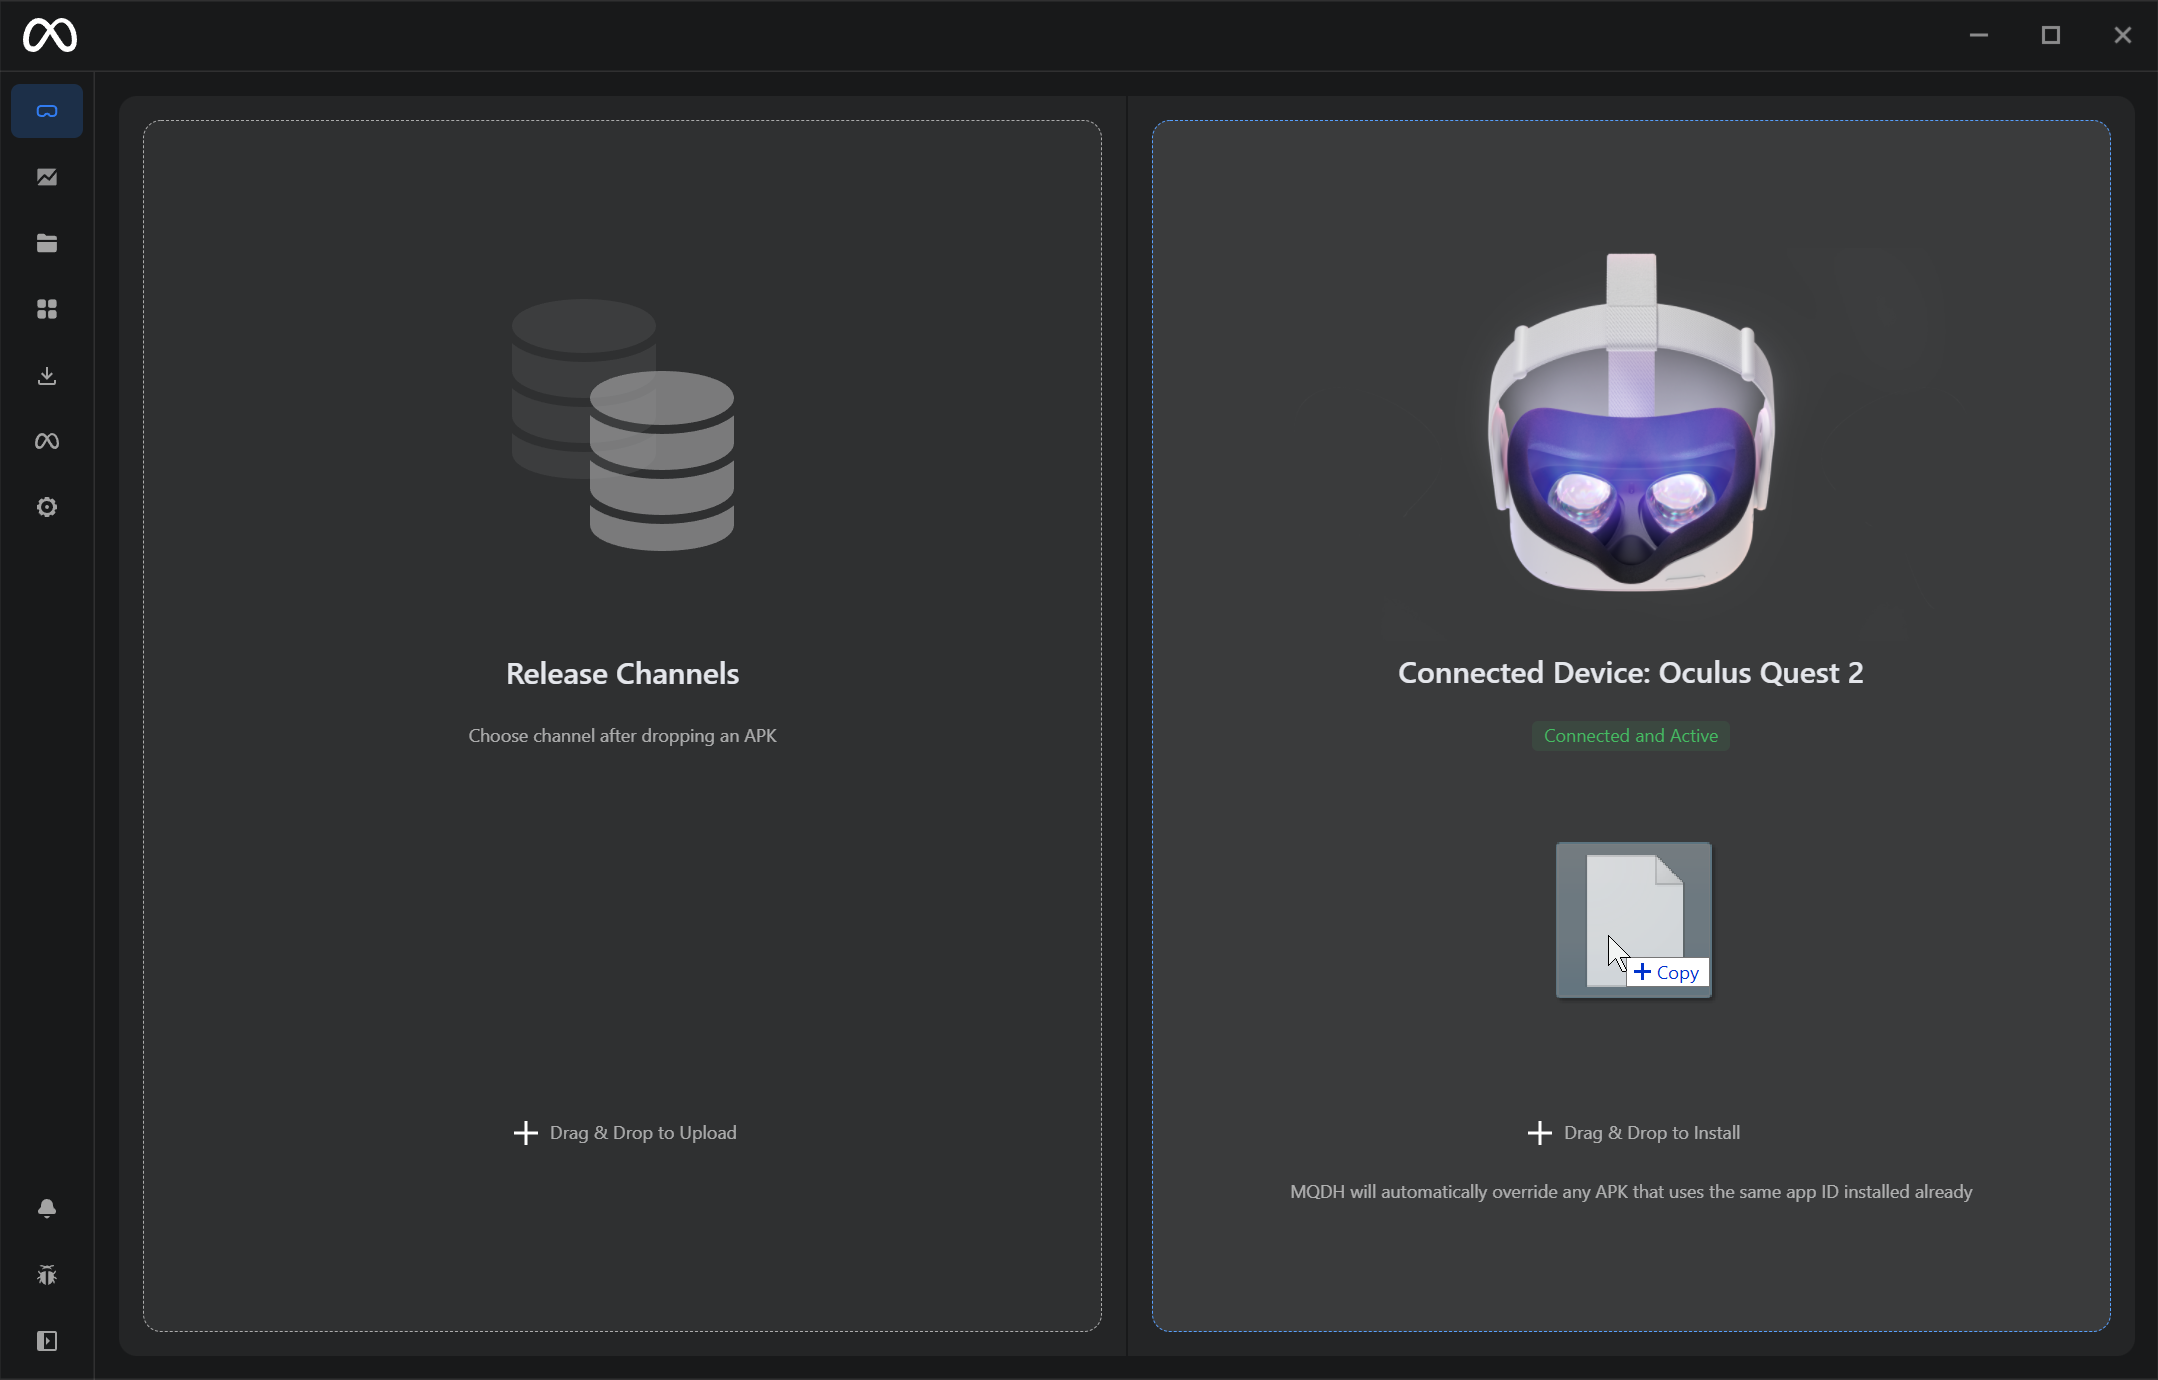
The Meta Quest Developer Hub Window
Run the Application
- Inside your Headset Go to Applications > Unknown Sources
- Click on the Application you just uploaded to the device.
Building for the Meta Quest Store?
Make sure your Manifest file looks like this
<?xml version="1.0" encoding="utf-8"?>
<manifest
    xmlns:android="http://schemas.android.com/apk/res/android"
    package="com.unity3d.player"
    xmlns:tools="http://schemas.android.com/tools">
    <application>
        <activity android:name="com.unity3d.player.UnityPlayerActivity"
                  android:theme="@style/UnityThemeSelector">
            <intent-filter>
                <action android:name="android.intent.action.MAIN" />
                <category android:name="com.oculus.intent.category.VR" />
                <category android:name="android.intent.category.LAUNCHER" />
            </intent-filter>
            <meta-data android:name="com.oculus.vr.focusaware" android:value="true" />
            <meta-data android:name="unityplayer.UnityActivity" android:value="true" />
        </activity>
        <meta-data android:name="com.htc.vr.content.NumDoFHmd" android:value="6DoF"/>
        <meta-data android:name="com.htc.vr.content.NumDoFController" android:value="6DoF"/>
        <meta-data android:name="com.htc.vr.content.NumController" android:value="2"/>
    </application>
    <uses-feature android:name="android.hardware.vr.headtracking" android:version="1" android:required="true" />
</manifest>
Congratulations on building your Application 🎉
Troubleshooting & Tips:
Always ensure that you have the latest Android SDK updates.
If you encounter build errors, check Unity's console for specific error messages.
Conclusion:
Building an Android app in Unity is a streamlined process, but always pay attention to details like compatibility and performance. Regularly update your tools and test frequently to ensure your app delivers the best experience to users.