Changing the Avatars Appearance
Flow ships with avatars that you can customise. One thing to note is that Trainers and Trainees are designed to have different coloured shirts so that in multi user the Trainers are easily identifiable.
The avatar prefabs have three variants, Male, Female and non gendered. These prefabs are located in:
Assets/Flow-SDK/Prefabs/Utilities/Networking/Resources/
With the names: “LuminousMale.prefab”, “LuminousFemale.prefab”, “LuminousNonGendered.prefab” respectively.
Changing the Avatars Shirt Colours
All our avatars use two different materials on their shirts. One material is for Trainer shirts and the other is for trainees. To customise these shirt colours simply locate these materials at
Assets/Flow-SDK/Art/Models/Avatars/Instructor Overalls/Instructor Mat.mat
for the Instructor and
Assets/Flow-SDK/Art/Models/Avatars/Overalls/Overalls_Mat.mat
For the trainee.
Once these assets have been located look for the UseColorMap check box and uncheck it
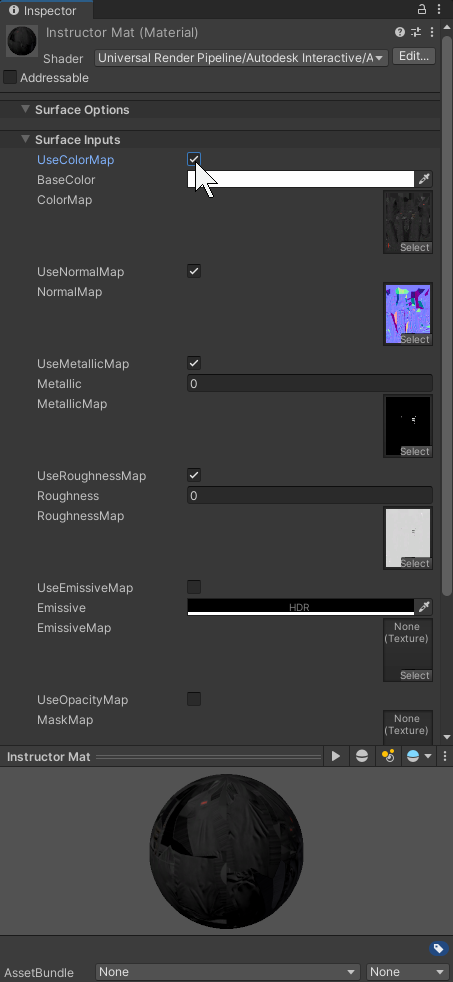
The Trainers Shirt Colour Material
Now select your desired colour for a Trainers Shirt. Now click the base colour and select your desired colour.
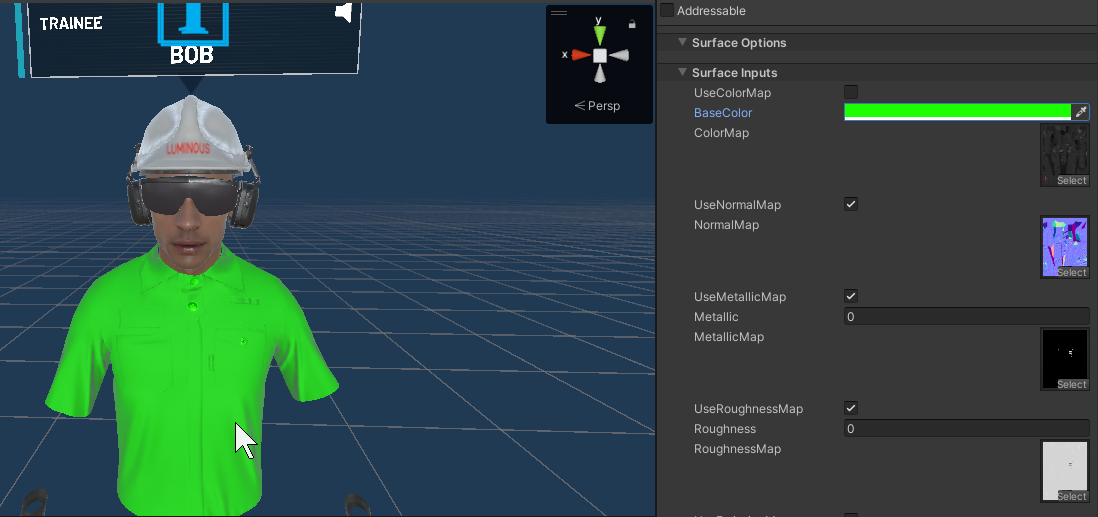
A Trainer with an altered shirt colour
This colour will also be used for Male, Female and non gendered prefabs.
To edit the trainers shirt colour repeat this process for the trainers shirt material.
Further Customisation
You can also edit the avatars in more depth, for example you could change the avatars hat, glasses or add any other accessories.
To further edit the avatars, open each prefab up.
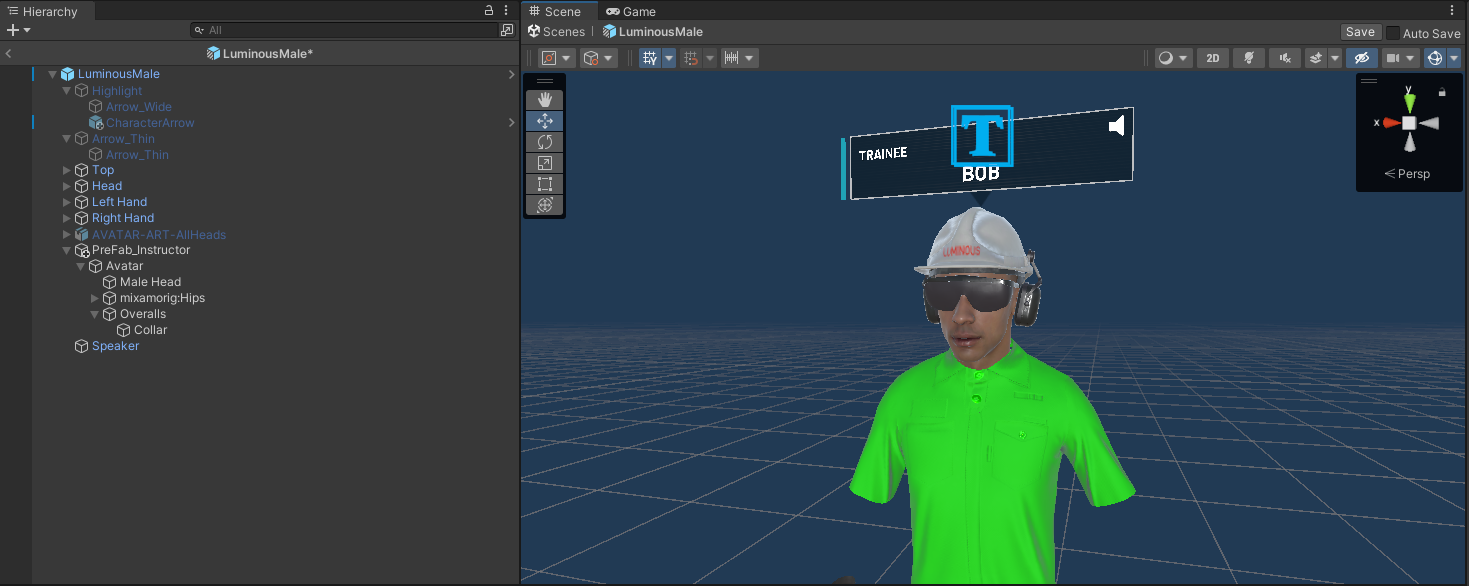
The Male Avatar
Lets say we want to change the Helmet this avatar is wearing. Click on the helmet to find where it is located in the hierarchy.
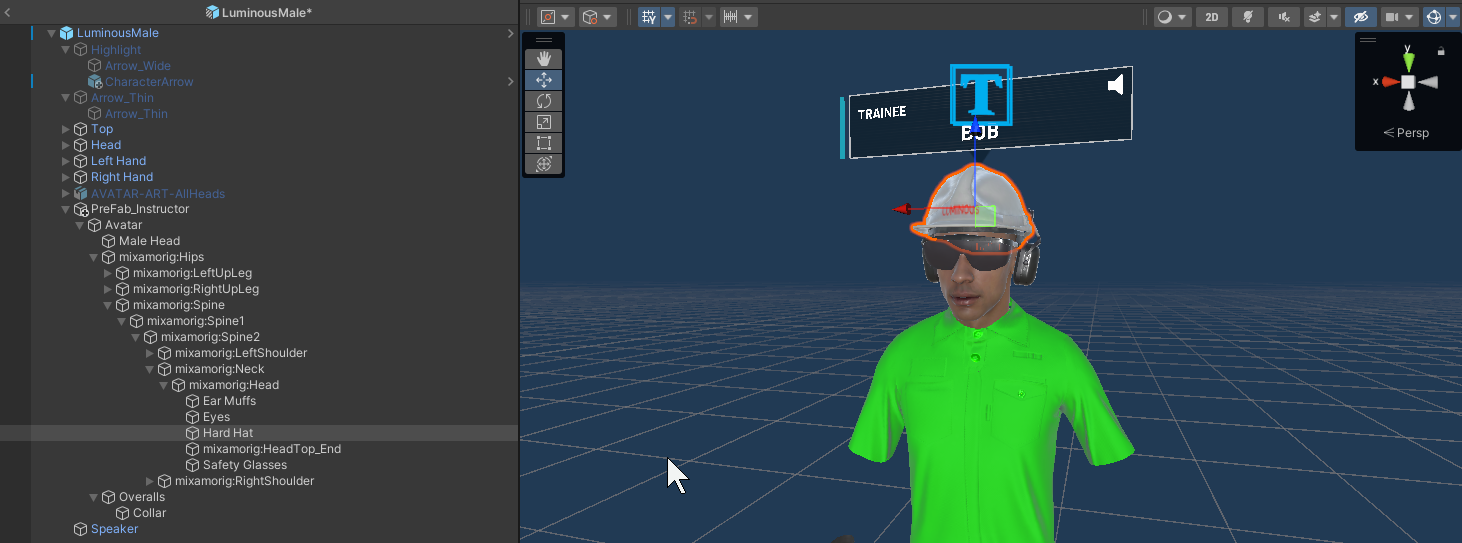
The Hard Hat on the Male Avatar
In this example I have turned off the hard hat game object and added a cowboy hat in the same location.
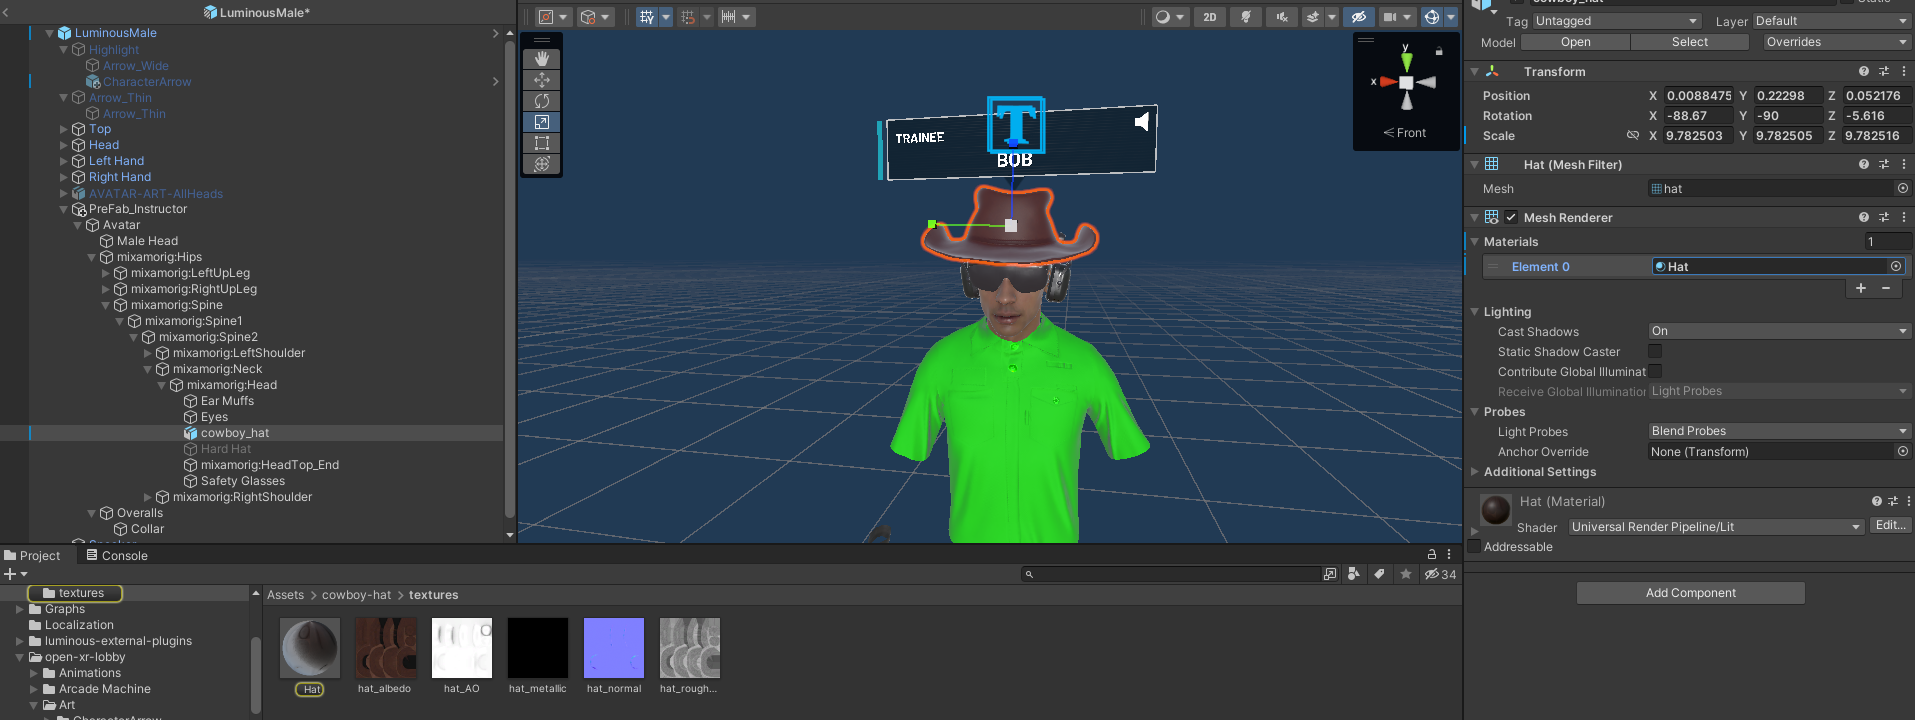
Adding a cowboy hat to the Male Avatar
Now if we enter multiplayer our avatar Male Avatar is wearing the cowboy hat
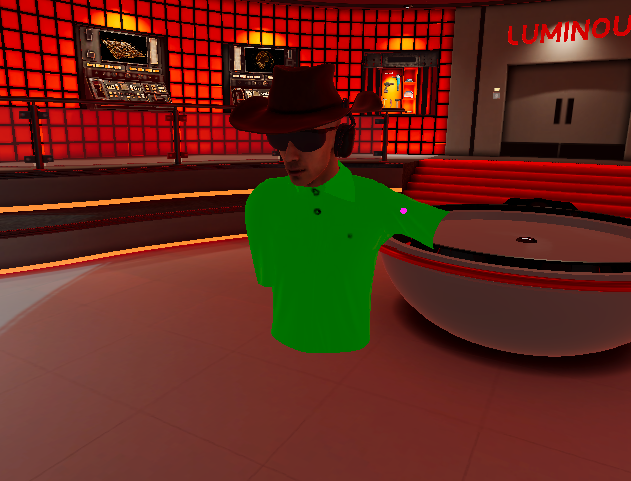
The Male Avatar as seen in Multiplayer
You can always explore the Avatar prefabs to add other accessories such as a face mask for a doctor avatar or a hair net for food safety worker, the possibilities are endless.
