
Quest Mixed Reality Setup (Experimental)
To make your App work with the mixed reality capabilities of the Meta Quest 2, 3 and Pro they're some extra steps you need to take before building. This process is laid put here.
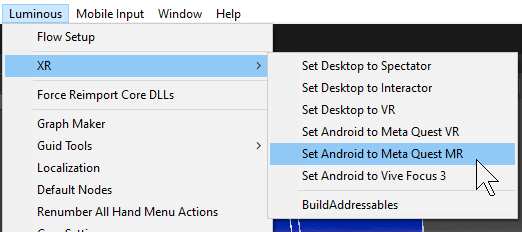
First ensure you have selected the Meta Quest Mixed Reality Option Location in Luminous > XR > Set Android to Quest MR. This enables some settings related to mixed reality and also enables the “PlayerQuestMR” scene in your build settings.
Setting the platform to work for the Quest Mixed Reality
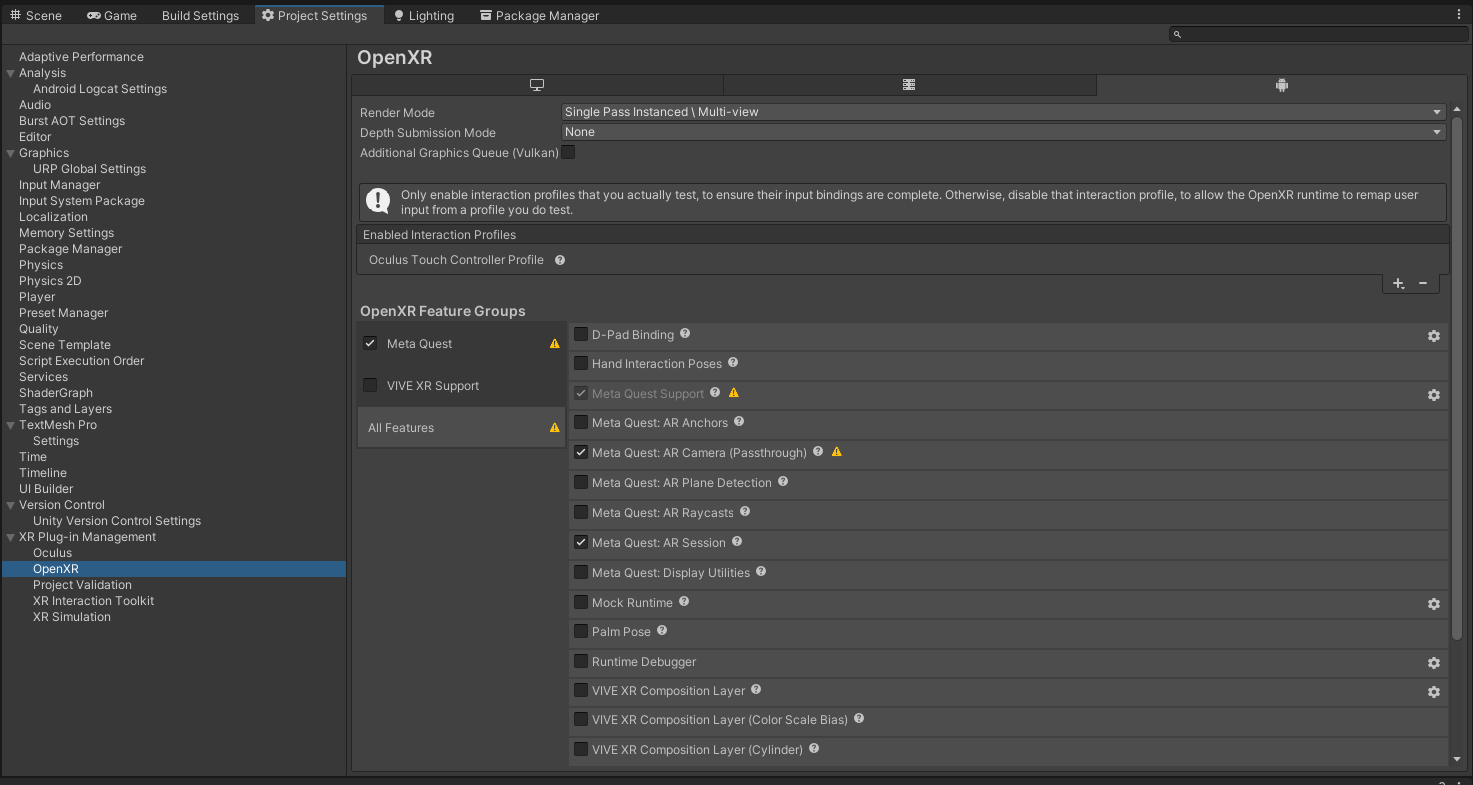
Ensure the above options are selected within the project settings as the setting platform button may miss the “AR Camera (Passthrough)” option
Create a new scene and set it as addressable as we are going to use it for the environment to load when within a module/scene
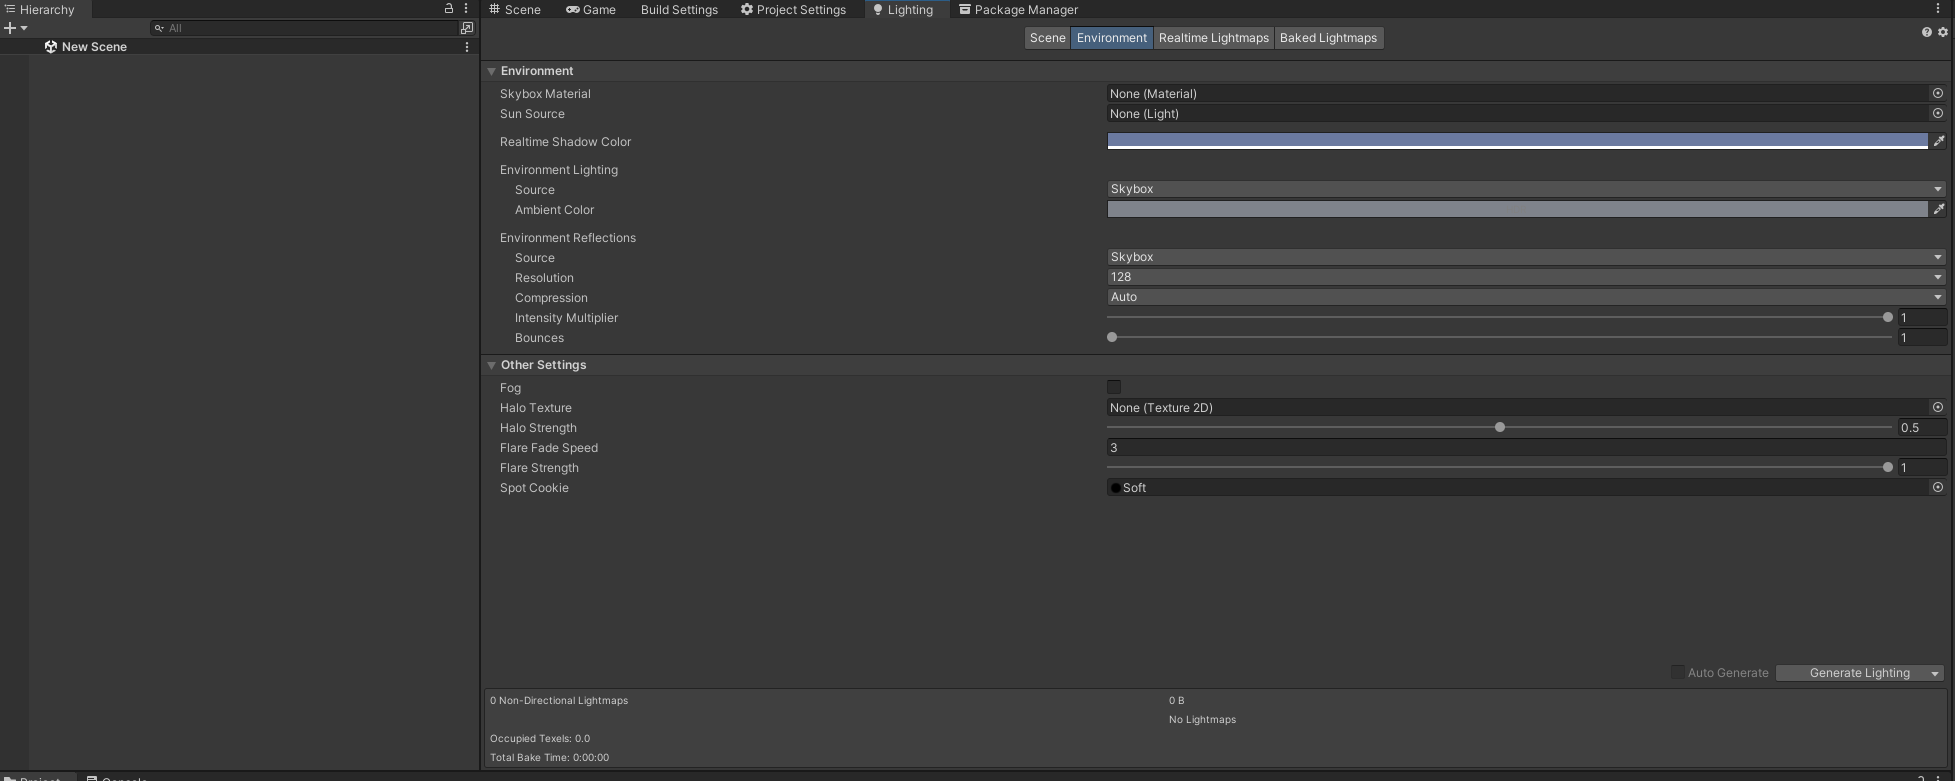
In the lighting tab with the scene open, remove the skybox under the “environment” tab and these default settings should be used
Next locate these assets in your Project assets located in Assets/Flow-SDK/Utilities/Render Settings/DeviceSpecificRenderPipelines/Resources/

The Render pipelines we need to edit
On these Render pipeline assets make sure terrain holes are turned off as well as HDR.
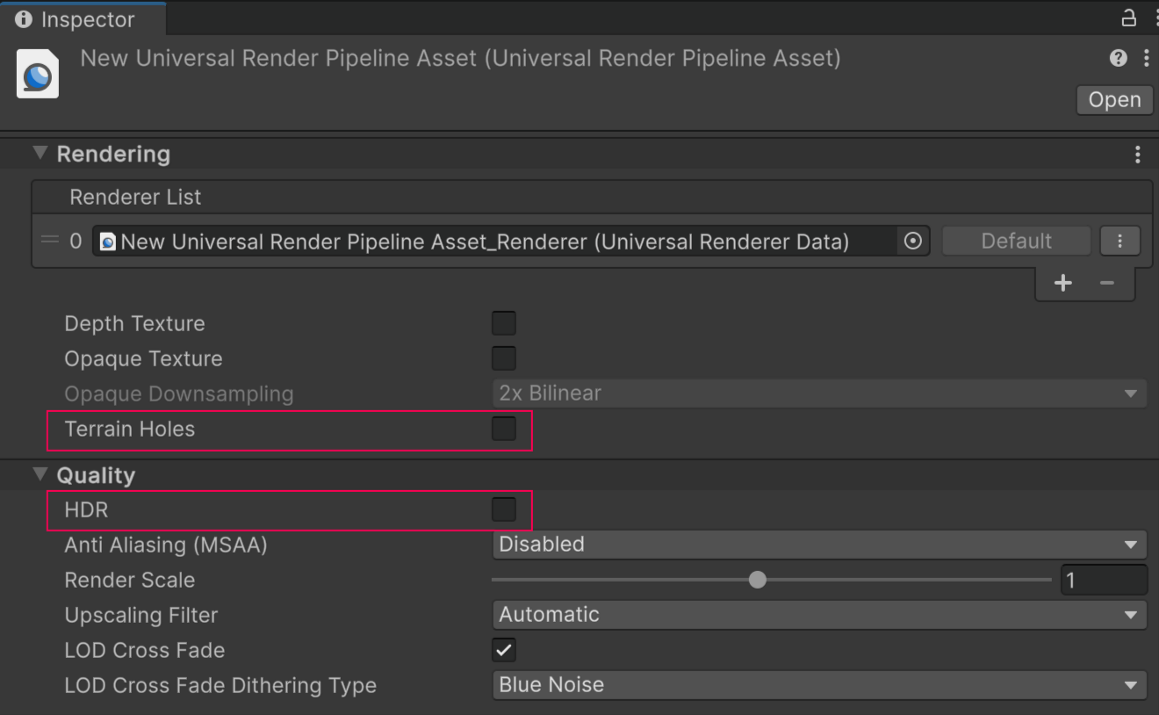
The settings that need to be disabled highlighted in red.
Next locate the Forward renderer asset located at: Assets/Flow-SDK/Utilities/Render Settings/ForwardRenderer

The location of the Forward Renderer
Once the forward renderer is located, turn off Post processing and set the Intermediate Textures to Auto.
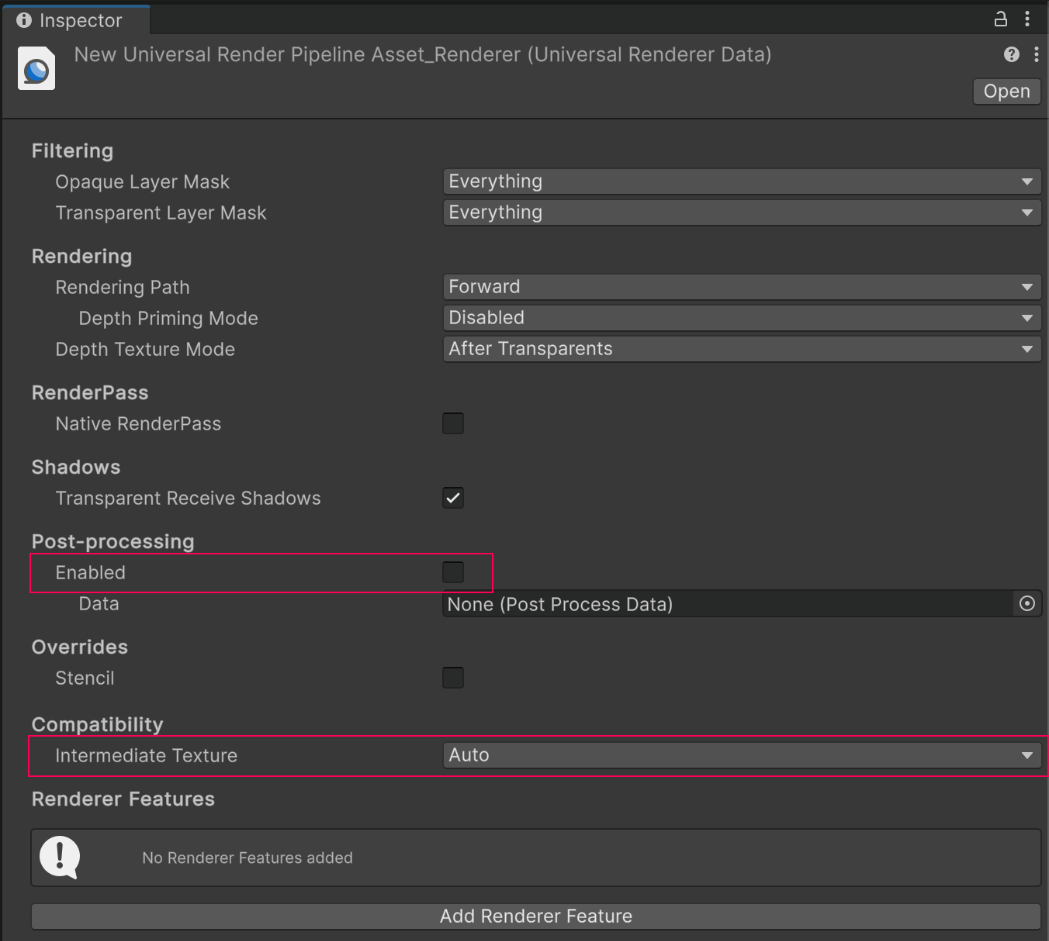
The forward renderer settings to edit
Lastly Click Add Render Feature and select AR Background.
That's it. You can now build your application as normal. The scene “PlayerMRQuest” has all the relevant settings enabled so that the passthrough cameras will work.
Passthrough only works in build. It is normal for your background to look black in editor.