Testing a Module
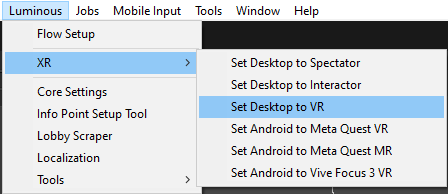
Testing a module is easy with the Flow SDK. Follow the steps below depending on your platform. Remember you can change your platform at any time by going to menu bar at the top and selecting Luminous > XR and setting it to your desired platform.
“Set Desktop to Regular” will change your OpenXR settings in preparation for a Desktop Build (No VR).
“Enable Desktop for VR” will change your OpenXR settings in preparation for a Desktop Build (Tethered VR).
“Set Android to Oculus” will change your OpenXR settings in preparation for an Android Build (Oculus).
“Set Android to Focus 3” will change your OpenXR settings in preparation for an Android Build (Vive Focus 3).
Selecting a Game Mode
You can easily test Assisted Learning/Training, Practice and Assessment modes by going to the Luminous Menu at the top and Selecting “Core Settings”
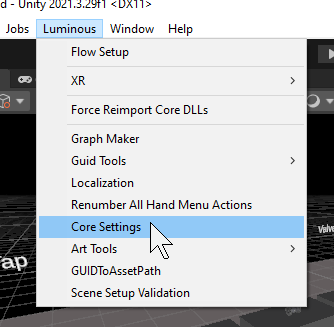
The Core Settings Location
Here you can select which game mode is active in the editor.
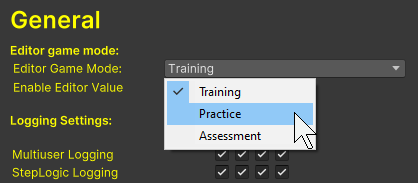
Changing the active game mode in Core Settings
Android Development
Drag the scene “PlayerVR” Located in “Flow-SDK/Scenes/PlayerVR” into your hierarchy.
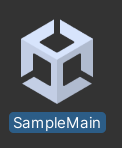
The Sample Main Unity Scene
Drag in your Module Scene too. Located in “Scenes/Modules”

A module Scene
Right click “PlayerVR” and set it as active. If “Set Active Scene” is greyed out it means the scene is already active.
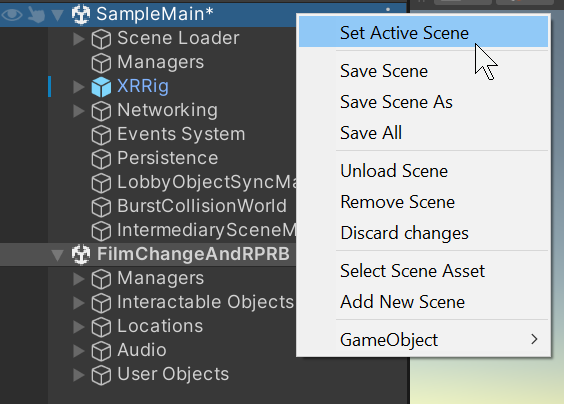
Setting the SampleMain scene active
Go to Luminous → XR → Set Desktop to VR. This sets up your OpenXR Settings in preparation for tethered VR.
Now plug in your Quest device and enter quest link in your headset.
Press play in the editor.
Playing through the Lobby
Alternatively you can choose to play your scenario from the very beginning going through the lobby. This will require the user to have a scenario and class created on the portal.
Once the related information has been set up in the back end you should be free to test your scenario and module through the Lobby.
Load the PlayerVR scene from “Flow-SDK/Scenes/PlayerVR”
Ensure you have clicked Luminous → XR → Set Desktop to VR
Plug in your Quest and enter Link.
Press play in the editor.
