Grab
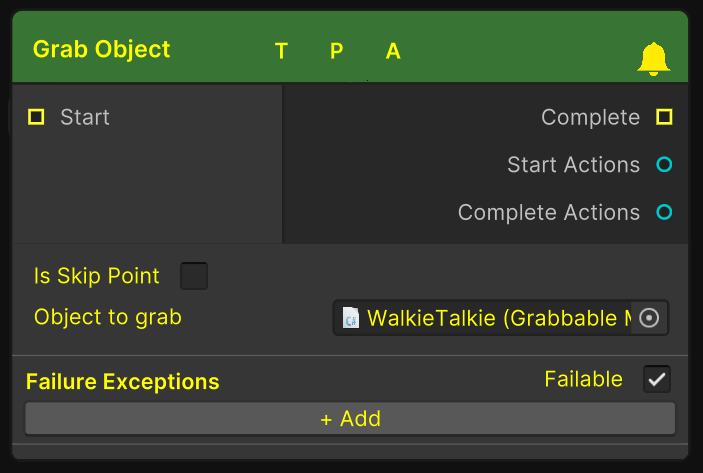
Grab nodes, as the name implies, requires a user to grab an object to progress. This could be grabbing a tool, a walkie talkie or even a fire extinguisher. Find an example of this already set up for you in Flow-SDK → Ready to Use Prefabs → Grabbable Sample
https://www.youtube.com/watch?v=bTjKh89SzrQ&ab_channel=LuminousXRGrab Step being used to grab a tool
Setup

Grab Node
Follow these steps to set up a new grabbable object that will progress the user in the graph when grabbed at the required step.
Scene Setup:
Start with a GameObject you'd like to be able to grab. This could be a cube for example.
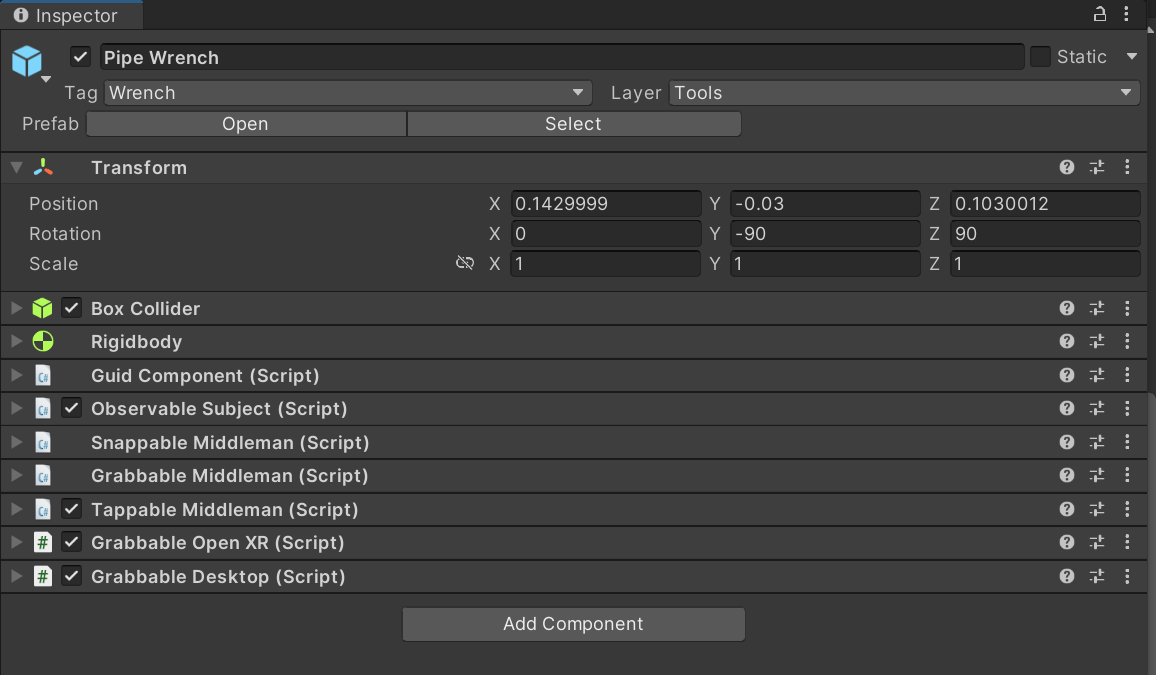
Attach a “Guid Component” script.
Attach a “Collider” Component - This is where the user will be able to grab the object.
Attach a “Rigidbody” Component.
Attach the “Grabbable Open XR” script.
Attach the “Grabbable Middleman” script.
Graph Setup:
Open your graph.
Right click and Create a new grab node (Steps → Grab).
Reference the grabbable middleman on the step.

The components needed on a GameObject for a Grab to work
That's it. Now when a user is on the Grab step, when they grab the newly made object they will complete the step.
Attach Transform
In the provided Grabbable Sample Prefab you will notice a child GameObject called Attach Point, this will be where a user will precisely hold the object once grabbed. For example if you wanted to set up a baseball bat you would move this transform to be in line with the bats handle.

The Attach Point GameObject
Desktop
Desktop doesn’t have a controller for the attached object to go to and instead uses an offset. You can change how this offset is aligned by going to the “Grabbable Desktop” component and changing the offset/rotation settings. This will only have an effect on Windows PC builds.

Multiuser
If you wish to use multiuser we would suggest having a NetworkGrabManagerOpenXR Component attached to the object, as well as the usual PhotonView/PhotonTransformView. This ensures players can ‘Takeover’ control of the object when they grab.

Network Grab Manager
For more information on the other inputs and outputs found on this node see Steps
