
Snap
A snap node requires a user to snap a specific object to a specific snap zone. For example this could be snapping a walkie talkie to a belt, or a tool to a toolbox, or even a permit to a worksite fence. We recommend all snappable objects start in an initial snapzone.
https://www.youtube.com/watch?v=N8d4KMlKfM0Snapping a tool to a Valve
Setup
Snap Node
To set up a snap zone requires three parts, the node in the graph as seen above, a snappable object, and a snap zone. Follow these steps to set up a new snappable object, snap zone and the snappable object node. that will progress the user in the graph when correct object is snapped at the required step.
Snap Zone Setup
A snap zone is the place the Snappable object will be placed.
Start with an empty game object.
Attach a “Guid Component” script.
Attach a “Collider” Component that will define the bounds of the snapzone.
Set the collider to a trigger.
Attach the “Snap Zone Open XR” script.
If you want this snapzone to only allow a specific object then set the Partnered Prefab reference to that object.
Attach the “Snapzone Middleman” script.
Ensure the Snapzone Middleman has a unique ID Number

it is best practice to show a user when they're close to Snapzone so that they understand when releasing an object will cause a snap. to achieve this we can use a highlighted version of the object that becomes visible only when the object is close to it.
Snap Zone Highlight Setup
Duplicate the object that will be snapped,
Apply the SnapZoneHighlight material to this object (Flow-SDK/Art/Materials)
Child this object to our Snapzone object
In the “Snap Zone Open XR” - Copy how the events are set up in the image below
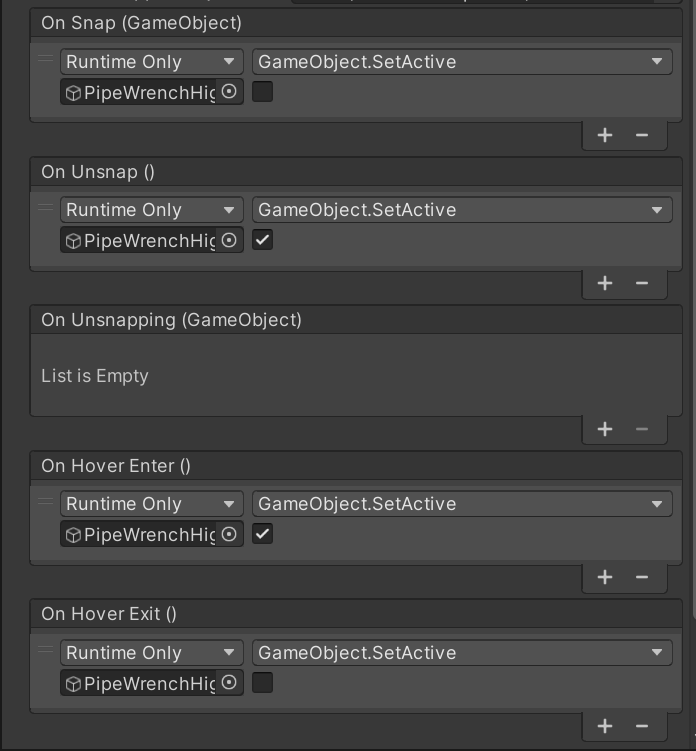
Snap Zone Open XR events to make a snapzone highlight be enabled when an object is close to it.
Once complete the Snapzone should look like it is below.

A set up snap zone GameObject
Now we are ready to make the snappable object.
Snappable Object Setup
A snappable object is the object that will then be snapped to a snapzone.
First follow the grabbable object setup tutorial, this is so we can grab the object
Add the Snappable Object script.
Next add a Snappable Middleman Component. Ensure this ID is unique
There is a tool to help with this mentioned in the “Note About Snappable Ids” section.

The Snappable Middleman Script
Once the Snap Zone and the Snappable Object are set up we can dive into the graph to link it all together
Snappable Node setup
Open a graph.
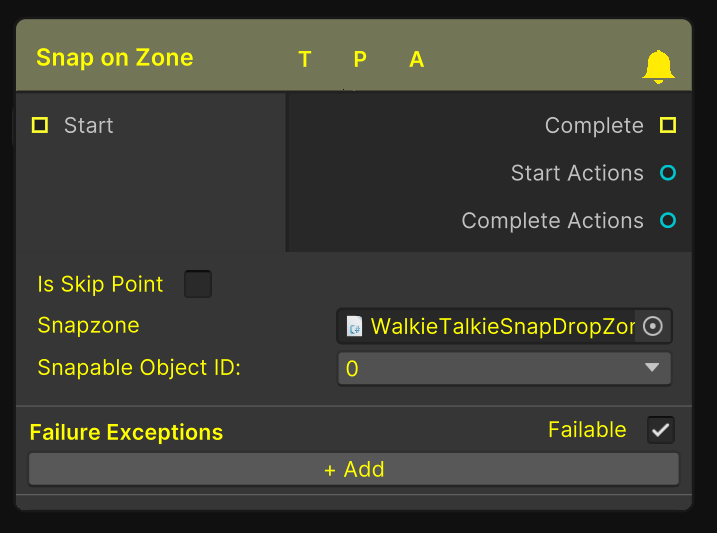
Right click and Create a new Snap on Zone node (Steps → Snap on Zone).
Reference the Grabbable Middleman on the step.
In the Snapzone field add the Snapzone we made earlier.
In the Snappable Object ID, be sure to reference the ID of the Snappable Object ID that we specified earlier.
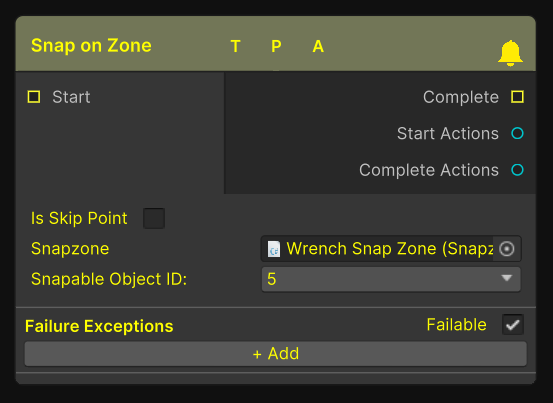
A Filled in Snap On Zone Node
That's it. Now when a user is on the Snap step, when they grab the Snappable object and release it inside the Snapzone they will complete the step.
Grabbable Objects Starting in Snapzones
We recommend all grabbable objects to start already in a Snapzone. This makes it easier for a user to then decide to put an object back if not needed as well as the Lost Object component to work.
To make an object start in a Snapzone follow these steps:
Create your Snappable Object as mentioned above
Create a Snapzone as mentioned above
Have the Snappable Object be placed in close proximity of the Snapzone (As it will become snapped on play)
On the Snap Zone Game Object find the “Snap Zone Open XR” script and set the partnered prefab to the object in the Hierarchy of what you want to start snapped.
Set the current snapped Object to the same Snappable Object you want to start snapped.
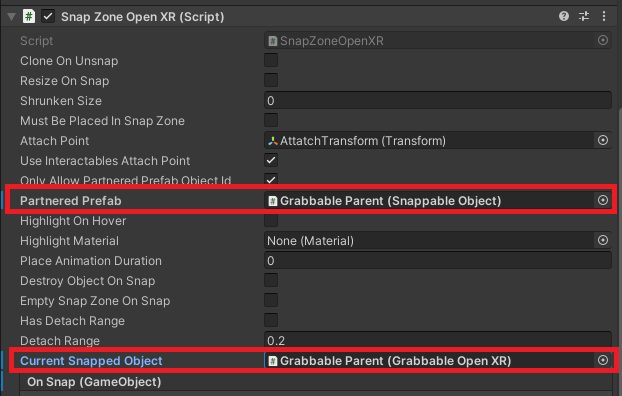
Snap Zone Open XR Component
A Note on Snappable IDs
Ids need to match and for larger projects this can become a headache. To help with this problem we have created a tool that can automatically assign unique IDs and should aid in the process of tracking them. We recommend that you use this tool before referencing everything in the graph. You can find details on how to use the tool here:
Snappable Objects Id Tool
For more information on the other inputs and outputs found on this node see Steps